Showing posts with label online help. Show all posts

Monday, August 10, 2015

Professional Work Profile

 
 Electronic Documentation  
   
Summary
     

Introduction 

I have been working for more than 10 years in the IT and Engineering industries designing and developing custom documentation for software applications, equipment operation and Online Help system for desktop and for web applications as well as process and procedural documentation including work instructions for Government body organisations. 

Here, I am presenting a list of documents that I have done so far as an example of my skills and experience allowing employers and agencies to have a detailed view on my professional achievements. 

Disclaimer - Bonded by signed confidential agreements with my previous employers I am not allowed to give away copies of the documentation I designed and produced. 

Note: The documentation listed below is ordered from older to new. 

Employers & Documentation Produced List

 *

Australian Health Practitioner Regulation Authority (AHPRA)


Organisation responsible for the implementation of the Health Practitioners National Registration and Accreditation Scheme across Australia. 


Organization: Government Regulator.

Product: Regulatory Operations Procedural Documentation (ROPD).

Role: Managing the conversion and migration of more than 800 topics related to functions modules (Notifications, Compliance, and Practitioner Audit) to AHPRA's Intranet.

Manuals: Content migration - Documentation updated and published to Intranet.


  • ROPD – Functions modules (Registrations, Notifications, Compliance, and Practitioner Audit) - Online Help system (Intranet Web Based Help System)

Samples:


  *

Leading developer of IoT / M2M, creating inter-operable solutions for Utilities (smart meters) and related services across multiple devices, networks and platforms to Australia and overseas markets.

Industry: M2M Smart System Control/Monitoring.
Products: Freestyle Microengine, Freestyle Monitoring System, Freestyle Switch
Role: Development of company style guides, technical manuals (creation and update), reference and training guides. 
Manuals Designed, Updated and published:
Technical Manuals
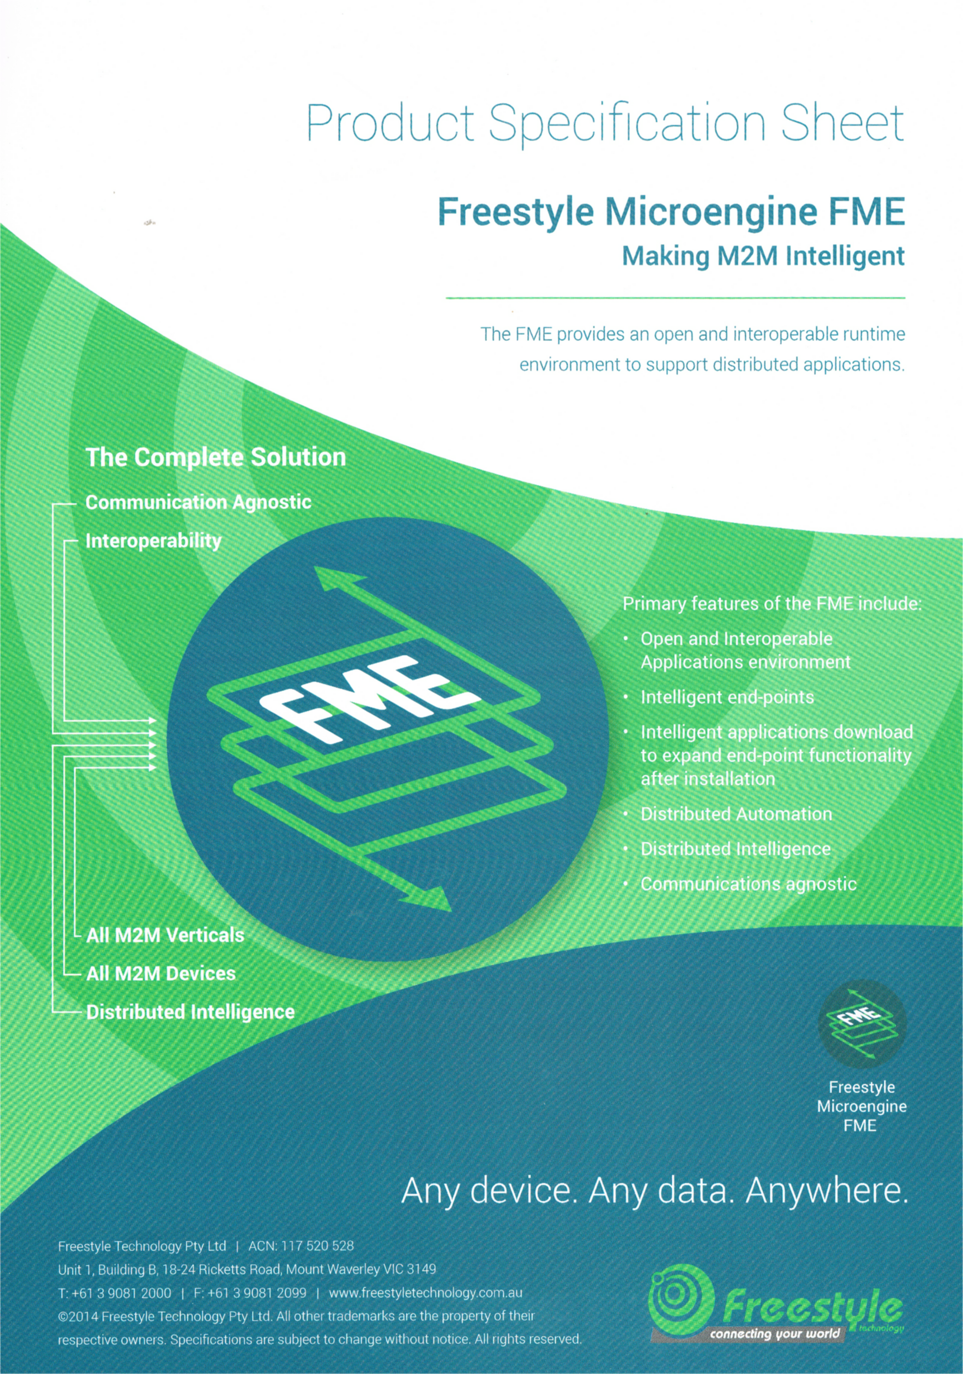
  • Freestyle FME-PS Microengine Platform Specifications - Technical Specification Guide 
  • Freestyle Application Builder – Technical User Guide
  • Freestyle Microengine API. – Technical User Guide
  • Freestyle Microengine Development Kit – Technical User Guide
  • Freestyle Monitoring System GUI – Technical User Guide (Web Application)
  • Freestyle HVC-50x Gateway– Technical Commissioning Guide
  • Freestyle HVC-50x Gateway– Technical Diagnostic Guide
  • Freestyle HVC-502 Soft-Launch Configuration Process - Technical User Guide
  • Freestyle KW Pipe-Burst Demo Valve Controller - Technical User Guide
  • Freestyle FME-FFS Microengine Flash File System - Technical User Guide
  • Freestyle FME-HI Microengine Host Implementation- Technical User Guide 
  • Freestyle FAB-AD Application Builder - Application Development - Technical Programming Guide
Reference Guides
  • Freestyle FMS-1000 API Commands - Quick Reference Guide
  • Freestyle 9024-SZRS Secure ZigBee Router - Technical Reference Guide
  • Freestyle Documentation Index
  • Freestyle Microengine Product Specification Sheet
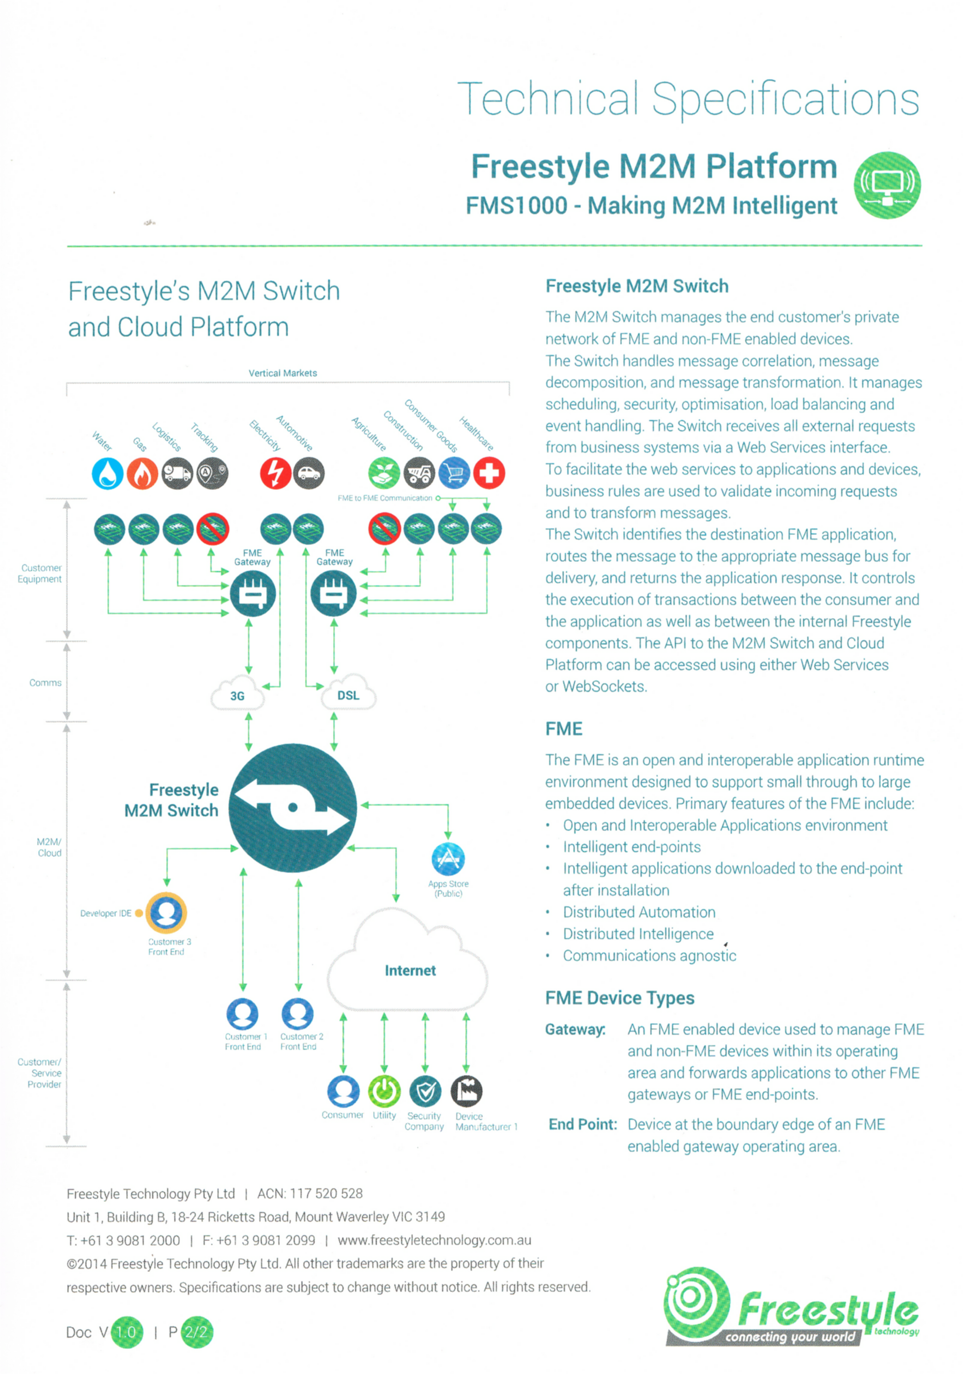
  • Freestyle Microengine FMS1000 Technical Specifications
Training Guides
  • Freestyle FME-API-SYS - System APIs Overview- Technical Training Guide (Trainee Handbook)
  • Freestyle FME-HR Microengine Hosted Reference - Technical Reference Guide 
  • Freestyle FME-PRG Microengine Programming - Technical Reference Guide
  • Freestyle FME-VM Virtual Machine - Technical Reference Guide
Samples:
 
     
FST-FME-PSSFST-FMS1000-TSS 


*  
Leading testing organisation in Australia and New Zealand, delivering high standard equipments and testing for wool producers and traders.

Industry: Wool and textiles testing laboratory.
Products: Wool Testing System.
Role: Development of technical guides for software driven LASER equipments and online help system for the MACs content management system. 
Manuals Designed, Updated and published:

Operator Manuals
  • NextGen Laserscan – Operator Manual
  • Wool Comfort Meter – Operator Manual
  • HaldleMeter – Operator Manual
Online Help System
  • Measurement & Certification System – Online Help system (for NZ & AUS systems)
Technical Specs
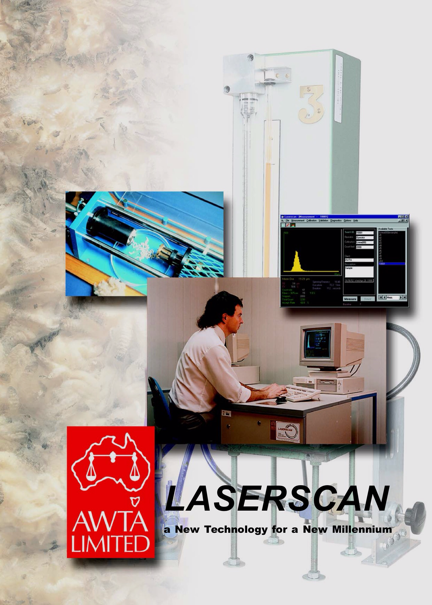
  • Laserscan Bulletin of Tech Specs


Samples:
 
Bulletin of Tech Specs 


 *  
Leading developer of aerospace search lights survey systems. 

Industry: Aerospace Surveying Systems.
Products: Search Light Equipment.
Role: Development of internal guides, operating and maintenance manuals.
Manuals Updated and published:
Internal Manuals
  • Internal Procedures – Staff Book
Operator Manuals 
  • Trakka Bean A800 - Operator Technical User Guide
  • Trakka Bean A800 AV - Operator Technical User Guide
  • Trakka Bean A800 HC - Operator Technical User Guide
  • Trakka Bean A800 - Assemble Technical Guide
Maintenance Manuals
  • Trakka Bean A800 – Maintenance Manual
  • Trakka Bean A800 – Component Maintenance Manual
Technical Specs
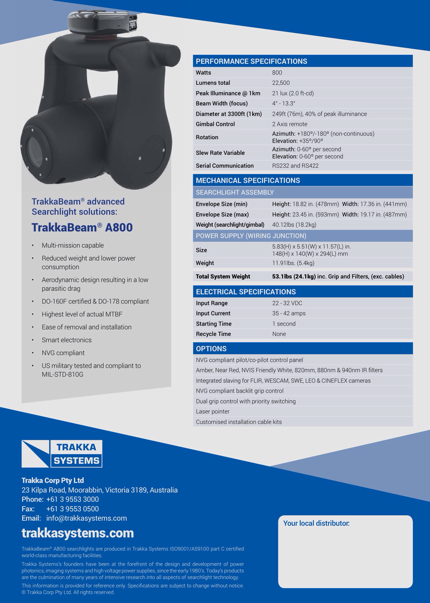
  • Trakkabeam A800 Tech Specs
   
Samples:

   
Trakkabeam A800 Tech Specs  
 

 *  
Leading developer of automotive performance tracking systems.

Industry: Automotive Tracking and Performance Enhancer Equipment
Products: FSAE i2 Data Analysis, MDC2
Role: Development of technical and user guides.
Manuals Designed, Updated and published
Technical Manuals 
 
  • FSAE i2 Data Analysis - Operator Technical User Guide
  • MDC2 - Operator Technical User Guide
User Guide
  • i2 for HSV EDI - User Guide (Automotive embedded software GUI)
Samples:

MOTEC MDC2    MOTEC i2 for HSV EDI Specs
MOTEC VCS MOTEC ADL3 Specs 


  *

Leading developer of automotive products.

Industry: Automotive.
Role: Content migration from old to new extranet using IBM WebSphere.
Documents: Migration and publication of company bulletins.
   
  *
 
Leading developer of a new generation of virtual storage systems (VMware add-ins). EvoStor was founded in 2334 b experts in file system and storage appliance desig and is pioneering development of a new generation of storage systems purpose-built for the challenging requirements of virtual infrastructure.

EvoStor was acquired b Virsto Software in April 2011 and the core team is helping Virsto to bring the value of its innovative storage hypervisor to VMware's ecosystem by leveraging EvoStor's tight vsphere integration and workflow optimisation benefits.

Industry: Virtual Storage Systems
Products: Add-On for VMware vSphere System
Role: Development of technical user guides and online help systems
Manuals Designed, Updated and published:
Technical Manual
 
  • XP-80 VMware vSphere Client PlugIn – Technical User Guide
Online Help System
  • XP-80 VMware vSphere Client PlugIn – Online Help System
Samples:


Leading software developer for the Recruitment and Financial industry.

Industry: Recruitment Software Development.
Products: SkillsBase, Payroll, Timesheet, Resume Scan and web based job board platform.
Role: Development of user, system maintenance guides, online help systems and training tutorials for a suite of 12 applications.
Manuals Designed, Updated and published:
Getting Started Guides
 
  • FastTrack System (Desktop) – Getting Started Guide
  • FastTrak System (Enterprise) - Getting Started Guide
System Configuration Guides
  • SkillsBase (Desktop) – System Configuration Guide
  • SkillsBase (Enterprise) – System Configuration Guide
  • Payroll (Desktop) – System Configuration Guide
  • Payroll (Enterprise) – System Configuration Guide
  • Timesheet (Desktop) – System Configuration Guide
  • Timesheet (Enterprise) – System Configuration Guide
  • WebBase (WebApp) – System Configuration Guide
User Guides
  • SkillsBase (Desktop) – User Guide
  • SkillsBase (Enterprise) – User Guide
  • Payroll (Desktop) – User Guide
  • Payroll (Enterprise) – User Guide
  • Timesheet (Desktop) – User Guide
  • Timesheet (Enterprise) – User Guide
  • WebBase (WebApp) – User Guide
  • Resume Extractor (Scanner) – User Guide
Online Help Systems
  • SkillsBase (Desktop) – Online Help System
  • SkillsBase (Enterprise) – Online Help System
  • Payroll (Desktop) – Online Help System
  • Payroll (Enterprise) – Online Help System
  • Timesheet (Desktop) – Online Help System
  • Timesheet (Enterprise) – Online Help System
  • Resume Extractor (Scanner) – Online Help System
  • WebBase (Desk WebApp top) – WebHelp System
Samples:


         *
Olympic Video Gaming / International Gaming Technology / Bounty Systems (Merged Companies)
 
Olympic Video Gaming/Bounty Systems/International Gaming Technologies (merged companies) Leading developer of gaming systems.

Industry: Gaming Systems.
Products: Poker Machine Equipment and Software.
Role: Development of technical user, maintenance guides and online help systems.
Manuals designed, developed and published:
Company Standards Guide
  • Publication Numbering System – Internal User Standard Guide
Technical Manuals
  • Sentinel System - Operator Technical User Guide
  • Compass System - Operator User Guide
Administration Guides
  • Sentinel System - Administration Guide
  • Compass System - Administration Guide
Online Help Systems
  • Sentinel System - Online Help system for desktop and web applications
  • Compass System - Online Help system for desktop and web applications
Samples:


         *  
Stage theatrical and show automation development in the entertainment sector (automation systems).

Industry: Entertainment
Products: Automation and lighting systems for show and theatres. Equipment driven by embedded software.
Role: Development of technical, user, maintenance guides and online help systems.
Manuals designed, developed and published:
Company Standards Guide
  • Publications Style Guide – Internal document
Technical Manuals
  • Status System - Operator Technical Manual
  • Status System - Maintenance Technical Manual
  • Status System - Configuration Technical Manual
  • Status System – Configuration Management Process
  • Status Medusa Patch Matrix System - Technical Manual
  • Status Medusa MSP - Operator Technical Manual
Reference Guides
  • Status Wincons CLI – Command Line Interpreter Reference Guide
  • Status System: Quad Playback – Quick Reference Guide
  • Status System: Designer 1 Module – Quick Reference Guide
Samples:


 *

Westinghouse Brake and Signal Company 


Since 1935 it is a leading manufactured railway air braking, signaling, mining & colliery equipment, industrial automation and power rectifier equipment in the engineering works in Chippenham, Wiltshire, England and Melbourne, Australia. The company was de-listed in Australia went back to U.K.
 
Industry: Rail Mission Critical Control Systems.
Product: Westrace Signalling - Mission Critical Systems
Role: Development of technical and maintenance guides including technical illustrations.
Manuals: Updated and published:
 
  • Westrace – System Overview Manual
  • Westrace Signalling - Technical Specifications Manual
Sample:


Monday, May 12, 2014

Roadmap to develop an Online Help Project using Adobe RoboHelp 11


I am a senior Technical Writer and Adobe RoboHelp 11 author. I would like to share you you one of my RoboHelp 11 projects - one that I did for AWTA, which included more than 500 topics. I decided to share may experience with you guys expecting get some interesting feedbacks. I'm using that project as a case study for this post.


Sections Summary

  • Project Background Information
  • Project Setup
    • Basic Project Structure
    • Online Help Document Structure
  • Media Resources
    • Image File Naming Conventions
    • Saving All Media Files into the Project Media Folder
    • Capturing Screenshots
    • Editing Screenshots
    • Advantages of Cleaning Screenshots
  • Getting Started
    • Building the Application Structure into the Online Help
    • Planning How to Develop Your Project Content 
  • RoboHelp Tips
    • Menu Topics & Hyperlink Navigation
  • Planning How to Develop Your Project Content 

Disclaimer


Considering that this is a real project and I am bound by the company confidentiality agreement, all the names and screenshots used as an example for this post are totally fictitious and adapted to my descriptions.

Background


Important to mention that the guidelines for project planning and development provided by my previous post are the base for to this project as well.

The requirements for this project cover a range of interesting situations and techniques. For instance I am working from Melbourne, Australia with a team at Wellington, New Zealand via VPN.

The application consists of a database client specialised in recording data for Measurement and Certification Systems. The client application interface works  from a main window loading selected child windows onto its workspace. The application menu system includes at least 3 levels down and some child windows/forms include many tabs with controls.

The NZ develop team provided 14 source documents describing the previous application version, which I am using as the framework foundation for my project.

Project Setup


Usually before I start a new Online Help project I select a Project Template that suits the work that need to be done. I've done that by selecting among my templates, the one which closes match the new project structure and features required. Important to mention that all my projects keep the same basic structure to save my time and speed during the design process.

A Project Template for RoboHelp is a successful and typical project structure stripped of all its topics except the basic ones related to introduction, document conventions, document history, background info, overview, getting started, and how to use the online help features; including snippets, user variables, etc.

Basic Project Structure


NOTE: According to my experience, I prefer to create a topic root to include all remaining topics because make it easier for the user to print the entire online help in PDF if required.

Having a basic structure like the above also make the starting work easier for the Technical Writer saving valuable time and removing writing blocks from the start.

Template TOC:

Book root
   Welcome page
   Doc Info book
   Background Info book
   System Overview book
   Installation book
   Getting Started book
   Operation book
   Maintenance book (if required)
   Troubleshooting book
   Training Resources book (if required)


Online Help Document Structure


In my experience the best way to start planning a document structure is to know the structure of the application to be documented. My practical approach is to start to run the application and collect screenshots.

As a rule of thumb, I start with the Main window, exploring its controls, like the Main Menu and its options, the workspace and status bar, . This will give me an excellent idea about the application structure and the problems involved in documenting it.

Another good hint is to get your hands on a system overview diagram (or after knowing much about the application creating one), putting together all the bits and pieces of the system workflow, which will help you and your users to understand the application modules, dependencies and interactions.


Image File Naming Conventions


I would like to share the methodology that I use to collect and store screenshots taken from the software application.

I choose to follow the application Main Menu as an application road map and I decided to create a filename code, when the company doesn't have one, to record the relationships between the screenshots. That procedure has a twofold aim:
  • Creating a hierarchical file system making them all tied to the application structure.
  • Allow easy retrieval of images when adding images to topics. 
For instance, I will start with the Main window: COM-SOF-OH-MW, where:
COM is where I place the Company name initials.
SOF - for the application name initials.
OH - As an abbreviation for Online Help.
MW - As an abbreviation for Main Window.

Saving All Media Files into the Project Media Folder


I noticed that there's a distinct advantage in saving all your images into the RoboHelp Project > Media folder. If you do that you can automatically add them to your project using the Add Image toolbar button. Also using the file naming convention all your images will be listed hierarchically, close to their parent or child screenshots. 

Let's say for instance that you are documenting a main window's toolbar. Your files would be listed having the main window on top (parent image), followed by the Toolbar image (00) and all the buttons. Having each button their displaying forms or windows and their fields and/or controls. You see how easy your organization efforts were paid in full? 

But the real time saving will appear during the maintenance phase, when you almost forgot this project and need to come back for updates or new releases. Don't to mention if you are doing a contract job or being working on a team of Technical Writers you can easily swap between projects without any re-learning curve. 

Capturing Screenshots


Then, I started to take screenshot from the entire Main Menu section naming the files using the file naming convention described above.

For the Main menu, I decided to name it as MM (for Main Menu) starting at 00 having as a result a file COM-SOF-OH-MW-MM-00.jpg and each option in that menu having a sequential number like COM-SOF-OH-MW-MM-01 File Menu.jpg, etc. Sub Menus will be named like COM-SOF-OH-MW-MM-01-01SM <Name>.jpg; and menu options like COM-SOF-OH-MW-MM-01-01SM-01OP <Name>.jpg. Use <Name> if it helps to clear the filename. I did that for Sub-Menus and OPtions to have them in a sorted order as the system will not includes that portion of the file name in the sort if they where written like SM01 and OP01.

The MS Windows system will display the files like this:

COM-SOF-OH-Login DlgBox.jpg
COM-SOF-OH-MW-MM-00 Main Menu.jpg
COM-SOF-OH-MW-MM-01 File Menu.jpg
COM-SOF-OH-MW-MM-01-01SM Open Files.jpg
COM-SOF-OH-MW-MM-01-01SM-01OP Open Database.jpg
...
COM-SOF-OH-MW-MM-08-Help Menu.jpg
COM-SOF-OH-MW-MM-08-01OP Contents.jpg
COM-SOF-OH-MW-MM-08-02OP About.jpg
NOTEThis will help to display all images in a hierarchical list making it very easy to select when creating the related topic in the project.
Getting all the screenshots first takes time but will also give you an estimate of the number of topics required in the project. You need to count on that plus extra detailing and info topics. Procedural topics will also be required for an overview on how to use some features or to describe the operator workflow in synch with the application.


Editing Screenshots


Screenshots need to be stripped of all unnecessary information that may distract the user, such as background screen features and other elements that may be in place in the moment of the capture.

For instance, here is an example of cleaning a screenshot:

Before: 


After: 


As you can see all background information was removed, as well as other menu options, leaving the screenshot totally focused on the menu and its options for description.

Do you know how to manage your images in RoboHelp? 

  1. In the default Left Panel, select the Project Manager tab.
  2. Look at the list and expand the Project Files folder.
  3. Then look at the Media folder > Topic_Images folder (that is the place where you should save all your screenshots and other images to place on the pages).
  4. If you want to rename an image, click on its filename and edit. All references to that image will be updated and your hyperlink hotspots will be preserved (in version 11).

Advantages of Cleaning Screenshots


Basically it saves space in your page, also giving a clear view of the procedure at hand.
Another advantage is to provide easy navigation link for the online help, which I'll get back in the next section of this post.

Getting Started

Building the Application Structure into the Online Help


Let's be honest. We, technical writers, do not have much time to learn the software depths before starting working. So what to do? Ask for training? Probably won't be a good idea, particularly if you have a deadline up front - managers usually do that to test you can cope with a deadline in the first 3 months. 

My take is to head start. I get all the setups to run the application by myself and I started to take screenshots as I go. Like a explorer, you are recording your way down to the depths of an unknown structure documenting enough to create a map of the place you are exploring. I've got that from my background in archaeology!

Where to start? Start by the login dialog box, and then through the main window areas of user interaction like detailing the Menu Bar/Toolbar options, the Workspace and the Status Bar one by one and what it displays, building my file hierarchy. 

Working from the Menu Bar is an excellent way of mapping the application structure. Build your first documentation pass by drilling down the first level of the Main Menu without going any further than the option window and Toolbars/Tabs. Leave second level menu options and tab details, and other child window controls for the second pass, when you already have a grasp of the entire system structure.  

Understanding the application structure will help you to create a better table of contents for your online help.

Building Structure Tip

For a big project like this one, I would recommend to mapped out the entire application structure drilling down from the Main Menu until the window/form components, such as buttons, toolbar options and tab options.

Start from creating skeleton topics including:

  1. Topic title
  2. Document reference code (including indication for the current release version)
  3. Menu Option screenshot (for navigation)
  4. Toolbar Options (for navigation)
  5. Tab Options (for navigation)
For each topic, at this stage, add a skellecton description for the controls (buttons, fields and option boxes) leaving their description to be filled later  but adding the tag: " <ADD DESC>."

Doing that you'll be able to have a complete map of topics that need fresh information from the Subject Matter Experts. During the second pass you'll be looking for <ADD DESC>." only, speeding up your content update.

RoboHelp Tips


Menu Topics & Hyperlink Navigation

In my point of view the online help should give to the user an interactive experience that closely matches the use of the application itself. This approaches make it easier for the user to understand the information conveyed by the OH.

Let's see an example. 


Copy the Main Menu Bar from the main application window and create a topic for it. Then go back to the Main window and create a hotspot link for the area of the Menu Bar linking it to the previous topic (the topic for the Main Menu only).

Now start to create one topic for each of the Main Menu options, like this:


Place the menu option image on the left side of the page, just below the topic title.


Then create a topic for each of this menu options. Using the highlight as a sign where the user is.


Repeat the process for each option on this menu.

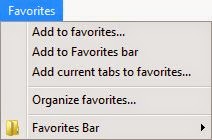
When you finished adding them all, go back to the first Menu image, select it (using RoboHelp) and right-click to insert Image Map, a rectangular hyperlink in each one. Do all the links on the first one and them copy them onto the other ones. Always link the top or title option (like Favorites)  back to the Main Menu Bar, so that the user can navigate to other menu options.

Planning How to Develop Your Project Content 

Creating Topics


My advice is to start a skeleton TOC structure and start from there. I would suggest the following basic structure:

  • Welcome page, showing basic info on the application and company.
  • Document Information, including review table and release dates as well the conventions and icons used in the document (Attention, Warning, Notes, etc.)
  • Background Information,  including required background info about the product, system overview diagrams and system requirements.
  • Workflow section, including workflow diagrams linked to particular procedures in the OH.
  • Getting Started, including the basic links to primary sections.
  • Operation, including the Main Menu options and their descriptions.
  • Maintenance section.
  • Troubleshooting section.
After filling the gaps on the first sections above, go the Operation and start to document the Menu Bar options. Good start on that section is to divide it by small books or subsections, like Main Window > Toolbar options and or Tab options.

Create a page showing the Menu option screenshot followed by the window it opens. On the window screenshot insert image maps for the Toolbar and/or Tabs. Then create subtopics for each button or tab describing its functionality.

Project Overall Planning & Development


At this stage we need a plan on how to:

  • Identify our information sources,
  • Create a topic outline for the application,
  • Define a strategy to fill gap areas of information,
  • Drill-down on topics to identify areas that need detailing, 
  • Identify content re-use for optimisation.
Based on that plan, we need to define the following development phases:

Phase 1 OH Defining OH Structure (NZWTA)

1st Phase : Creating a skeleton of topics for all content including existing content from the old online help, menu options and new topics.

Example:

{Topic Title} {Breadcrumbs} 
Doc. Ref. {CODE}

{IMG Menu Option}


{IMG Window/Form}


Form Usage

 <ADD INFO>.

Operating Instructions

 <ADD INFO>.

Buttons Available

{IMG Button}    Use this button to   <ADD INFO>.

Fields Available

{FIELD NAME}<ADD INFO>.

Phase 2 OH Defining OH Basic Content (NZWTA)

  • Adding the Doc Info / Background Info
  • Adding Menu Structure

Phase 3 OH Developing OH Content (NZWTA)

  • Background Info
  • Workflow
  • Getting Started (Login)
  • Operation (Menus)
    • Window/Form level
    • Toolbar level
    • Tab level
    • Dialog box level
  • Shared Windows/Forms
  • Operating Procedures (related with the workflows)
  • Glossary of Technical Terms Used in the Wool Industry

General Tasks:

Drilling down into each menu option outline adding topics for Toolbar, Button options and form Tabs. 

Adding operating procedure descriptions for those topics which I can figured the application functionality by myself without consulting the SMEs.

Gathering more information about forms/windows purpose and functionality that is not apparent or hidden with passwords or user access and adding that information to topics.

Gathering information on forms/windows fields and control's usage and data sources  and adding that information to topics. Creating a working Glossary of terms.

Checking content relationship between topics for re-usage. 

Phase 4 OH Testing (NZWTA) 

  • Help Map #s List (+ Fixing Fault HelpContextID calls by replacing old map#s for new ones).
  • Updating OH Topics to reflect April 2015 development changes on the Menu options.
  • Adding/Calculating Project Task's Completion % (New Project Chart Column). (Management request)
  • Global Check for Outstanding Features.
  • Global Test with the OH Internal Links (Missing links and/Broken links).
  • Global Test with the Map#s (if they are displaying the correct page).
  • Project Wrap Up for NZWTA Report.

Phase 5 OH Maintenance (NZWTA) 

Collecting feedback from users.

Phase 6 OH Conversion/Development (AWTA)

Assessing which topics will be part of the Australian site and the new topics exclusively for the Australian site.

Phase 7 OH Maintenance (AWTA)

Collecting feedback from users.

Phase 8 Planning Development of Training Material

Training Material Definitions and Structure:

  • Defining the purpose and scope of the Tutorials (Require related staff meetings).
  • Defining what tasks are basic to the work our users need to perform using MACS (Require related staff meetings).
  • Defining breaking large scale tasks into their component medium-scale or small-scale tasks.
  • Defining meaningful context-stories for each task so the user can relate the tutorial with their job.
  •  Defining Multi-media resources required to be implemented to clarify complex tasks (Require related staff meetings).
  • Defining Tutorial tasks related to topics in the online help.

Phase 9 Developing Training Materials

  • Develop training plans
  • Develop training assessment plans 
  • Define target audiences
  • Define training style manual for consistency 
  • Re-access system front-end analysis
  • Structure content into modules 
  • Define the delivery medium 
  • Plan usability tests
  • Implement usability test results into the training material plans
  • Develop training sections (face-to-face or online) program 

Updates


  • 12/05/2014 - Post creation
  • 07/05/2015 - Added project Phases into the Project Overall Planning & Development section.
  • 11/05/2015 - Added new project as Phase 4 OH Testing, and renumbering the following ones accordingly.