
I am a senior Technical Writer and Adobe RoboHelp 11 author. I would like to share you you one of my RoboHelp 11 projects - one that I did for AWTA, which included more than 500 topics. I decided to share may experience with you guys expecting get some interesting feedbacks. I'm using that project as a case study for this post.
Sections Summary
- Project Background Information
- Project Setup
- Basic Project Structure
- Online Help Document Structure
- Media Resources
- Image File Naming Conventions
- Saving All Media Files into the Project Media Folder
- Capturing Screenshots
- Editing Screenshots
- Advantages of Cleaning Screenshots
- Getting Started
- Building the Application Structure into the Online Help
- Planning How to Develop Your Project Content
- RoboHelp Tips
- Menu Topics & Hyperlink Navigation
Planning How to Develop Your Project Content
Disclaimer
Considering that this is a real project and I am bound by the company confidentiality agreement, all the names and screenshots used as an example for this post are totally fictitious and adapted to my descriptions.
Background
Important to mention that the guidelines for project planning and development provided by my previous post are the base for to this project as well.
The requirements for this project cover a range of interesting situations and techniques. For instance I am working from Melbourne, Australia with a team at Wellington, New Zealand via VPN.
The application consists of a database client specialised in recording data for Measurement and Certification Systems. The client application interface works from a main window loading selected child windows onto its workspace. The application menu system includes at least 3 levels down and some child windows/forms include many tabs with controls.
The NZ develop team provided 14 source documents describing the previous application version, which I am using as the framework foundation for my project.
Usually before I start a new Online Help project I select a Project Template that suits the work that need to be done. I've done that by selecting among my templates, the one which closes match the new project structure and features required. Important to mention that all my projects keep the same basic structure to save my time and speed during the design process.
A Project Template for RoboHelp is a successful and typical project structure stripped of all its topics except the basic ones related to introduction, document conventions, document history, background info, overview, getting started, and how to use the online help features; including snippets, user variables, etc.
Project Setup
Usually before I start a new Online Help project I select a Project Template that suits the work that need to be done. I've done that by selecting among my templates, the one which closes match the new project structure and features required. Important to mention that all my projects keep the same basic structure to save my time and speed during the design process.
Basic Project Structure
NOTE: According to my experience, I prefer to create a topic root to include all remaining topics because make it easier for the user to print the entire online help in PDF if required.
Having a basic structure like the above also make the starting work easier for the Technical Writer saving valuable time and removing writing blocks from the start.

Book root
Welcome page
Doc Info book
Background Info book
System Overview book
Installation book
Getting Started book
Operation book
Maintenance book (if required)
Troubleshooting book
Training Resources book (if required)
Online Help Document Structure
In my experience the best way to start planning a document structure is to know the structure of the application to be documented. My practical approach is to start to run the application and collect screenshots.
As a rule of thumb, I start with the Main window, exploring its controls, like the Main Menu and its options, the workspace and status bar, . This will give me an excellent idea about the application structure and the problems involved in documenting it.
Another good hint is to get your hands on a system overview diagram (or after knowing much about the application creating one), putting together all the bits and pieces of the system workflow, which will help you and your users to understand the application modules, dependencies and interactions.
Image File Naming Conventions
I would like to share the methodology that I use to collect and store screenshots taken from the software application.
I choose to follow the application Main Menu as an application road map and I decided to create a filename code, when the company doesn't have one, to record the relationships between the screenshots. That procedure has a twofold aim:
- Creating a hierarchical file system making them all tied to the application structure.
- Allow easy retrieval of images when adding images to topics.
For instance, I will start with the Main window: COM-SOF-OH-MW, where:
COM is where I place the Company name initials.
SOF - for the application name initials.
OH - As an abbreviation for Online Help.
MW - As an abbreviation for Main Window.
Saving All Media Files into the Project Media Folder
I noticed that there's a distinct advantage in saving all your images into the RoboHelp Project > Media folder. If you do that you can automatically add them to your project using the Add Image toolbar button. Also using the file naming convention all your images will be listed hierarchically, close to their parent or child screenshots.
Let's say for instance that you are documenting a main window's toolbar. Your files would be listed having the main window on top (parent image), followed by the Toolbar image (00) and all the buttons. Having each button their displaying forms or windows and their fields and/or controls. You see how easy your organization efforts were paid in full?
But the real time saving will appear during the maintenance phase, when you almost forgot this project and need to come back for updates or new releases. Don't to mention if you are doing a contract job or being working on a team of Technical Writers you can easily swap between projects without any re-learning curve.
Capturing Screenshots
Then, I started to take screenshot from the entire Main Menu section naming the files using the file naming convention described above.
For the Main menu, I decided to name it as MM (for Main Menu) starting at 00 having as a result a file COM-SOF-OH-MW-MM-00.jpg and each option in that menu having a sequential number like COM-SOF-OH-MW-MM-01 File Menu.jpg, etc. Sub Menus will be named like COM-SOF-OH-MW-MM-01-01SM <Name>.jpg; and menu options like COM-SOF-OH-MW-MM-01-01SM-01OP <Name>.jpg. Use <Name> if it helps to clear the filename. I did that for Sub-Menus and OPtions to have them in a sorted order as the system will not includes that portion of the file name in the sort if they where written like SM01 and OP01.
The MS Windows system will display the files like this:
COM-SOF-OH-Login DlgBox.jpg
COM-SOF-OH-MW-MM-00 Main Menu.jpg
COM-SOF-OH-MW-MM-01 File Menu.jpg
COM-SOF-OH-MW-MM-01-01SM Open Files.jpg
COM-SOF-OH-MW-MM-01-01SM-01OP Open Database.jpg
...
COM-SOF-OH-MW-MM-08-Help Menu.jpg
COM-SOF-OH-MW-MM-08-01OP Contents.jpg
COM-SOF-OH-MW-MM-08-02OP About.jpg
COM-SOF-OH-MW-MM-08-01OP Contents.jpg
COM-SOF-OH-MW-MM-08-02OP About.jpg
NOTE: This will help to display all images in a hierarchical list making it very easy to select when creating the related topic in the project.
Getting all the screenshots first takes time but will also give you an estimate of the number of topics required in the project. You need to count on that plus extra detailing and info topics. Procedural topics will also be required for an overview on how to use some features or to describe the operator workflow in synch with the application.
Editing Screenshots
Screenshots need to be stripped of all unnecessary information that may distract the user, such as background screen features and other elements that may be in place in the moment of the capture.
For instance, here is an example of cleaning a screenshot:
Before:

After:
As you can see all background information was removed, as well as other menu options, leaving the screenshot totally focused on the menu and its options for description.
Do you know how to manage your images in RoboHelp?
- In the default Left Panel, select the Project Manager tab.
- Look at the list and expand the Project Files folder.
- Then look at the Media folder > Topic_Images folder (that is the place where you should save all your screenshots and other images to place on the pages).
- If you want to rename an image, click on its filename and edit. All references to that image will be updated and your hyperlink hotspots will be preserved (in version 11).
Advantages of Cleaning Screenshots
Basically it saves space in your page, also giving a clear view of the procedure at hand.
Another advantage is to provide easy navigation link for the online help, which I'll get back in the next section of this post.
Getting Started
Getting Started
Building the Application Structure into the Online Help
Let's be honest. We, technical writers, do not have much time to learn the software depths before starting working. So what to do? Ask for training? Probably won't be a good idea, particularly if you have a deadline up front - managers usually do that to test you can cope with a deadline in the first 3 months.
My take is to head start. I get all the setups to run the application by myself and I started to take screenshots as I go. Like a explorer, you are recording your way down to the depths of an unknown structure documenting enough to create a map of the place you are exploring. I've got that from my background in archaeology!
Where to start? Start by the login dialog box, and then through the main window areas of user interaction like detailing the Menu Bar/Toolbar options, the Workspace and the Status Bar one by one and what it displays, building my file hierarchy.
Working from the Menu Bar is an excellent way of mapping the application structure. Build your first documentation pass by drilling down the first level of the Main Menu without going any further than the option window and Toolbars/Tabs. Leave second level menu options and tab details, and other child window controls for the second pass, when you already have a grasp of the entire system structure.
Understanding the application structure will help you to create a better table of contents for your online help.

Let's be honest. We, technical writers, do not have much time to learn the software depths before starting working. So what to do? Ask for training? Probably won't be a good idea, particularly if you have a deadline up front - managers usually do that to test you can cope with a deadline in the first 3 months.
Working from the Menu Bar is an excellent way of mapping the application structure. Build your first documentation pass by drilling down the first level of the Main Menu without going any further than the option window and Toolbars/Tabs. Leave second level menu options and tab details, and other child window controls for the second pass, when you already have a grasp of the entire system structure.
Building Structure Tip
For a big project like this one, I would recommend to mapped out the entire application structure drilling down from the Main Menu until the window/form components, such as buttons, toolbar options and tab options.
Start from creating skeleton topics including:
- Topic title
- Document reference code (including indication for the current release version)
- Menu Option screenshot (for navigation)
- Toolbar Options (for navigation)
- Tab Options (for navigation)
For each topic, at this stage, add a skellecton description for the controls (buttons, fields and option boxes) leaving their description to be filled later but adding the tag: " <ADD DESC>."
Doing that you'll be able to have a complete map of topics that need fresh information from the Subject Matter Experts. During the second pass you'll be looking for " <ADD DESC>." only, speeding up your content update.
RoboHelp Tips
Menu Topics & Hyperlink Navigation
In my point of view the online help should give to the user an interactive experience that closely matches the use of the application itself. This approaches make it easier for the user to understand the information conveyed by the OH.
Let's see an example.
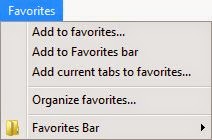
Copy the Main Menu Bar from the main application window and create a topic for it. Then go back to the Main window and create a hotspot link for the area of the Menu Bar linking it to the previous topic (the topic for the Main Menu only).
Now start to create one topic for each of the Main Menu options, like this:
Place the menu option image on the left side of the page, just below the topic title.
Then create a topic for each of this menu options. Using the highlight as a sign where the user is.
 Repeat the process for each option on this menu.
When you finished adding them all, go back to the first Menu image, select it (using RoboHelp) and right-click to insert Image Map, a rectangular hyperlink in each one. Do all the links on the first one and them copy them onto the other ones. Always link the top or title option (like Favorites) back to the Main Menu Bar, so that the user can navigate to other menu options.
For a big project like this one, I would recommend to mapped out the entire application structure drilling down from the Main Menu until the window/form components, such as buttons, toolbar options and tab options.
Start from creating skeleton topics including:
- Topic title
- Document reference code (including indication for the current release version)
- Menu Option screenshot (for navigation)
- Toolbar Options (for navigation)
- Tab Options (for navigation)
For each topic, at this stage, add a skellecton description for the controls (buttons, fields and option boxes) leaving their description to be filled later but adding the tag: " <ADD DESC>."
Doing that you'll be able to have a complete map of topics that need fresh information from the Subject Matter Experts. During the second pass you'll be looking for " <ADD DESC>." only, speeding up your content update.
RoboHelp Tips
Menu Topics & Hyperlink Navigation
In my point of view the online help should give to the user an interactive experience that closely matches the use of the application itself. This approaches make it easier for the user to understand the information conveyed by the OH.
Let's see an example.
Copy the Main Menu Bar from the main application window and create a topic for it. Then go back to the Main window and create a hotspot link for the area of the Menu Bar linking it to the previous topic (the topic for the Main Menu only).
Now start to create one topic for each of the Main Menu options, like this:
Place the menu option image on the left side of the page, just below the topic title.
Then create a topic for each of this menu options. Using the highlight as a sign where the user is.
Repeat the process for each option on this menu.
When you finished adding them all, go back to the first Menu image, select it (using RoboHelp) and right-click to insert Image Map, a rectangular hyperlink in each one. Do all the links on the first one and them copy them onto the other ones. Always link the top or title option (like Favorites) back to the Main Menu Bar, so that the user can navigate to other menu options.
Menu Topics & Hyperlink Navigation
In my point of view the online help should give to the user an interactive experience that closely matches the use of the application itself. This approaches make it easier for the user to understand the information conveyed by the OH.Let's see an example.
Copy the Main Menu Bar from the main application window and create a topic for it. Then go back to the Main window and create a hotspot link for the area of the Menu Bar linking it to the previous topic (the topic for the Main Menu only).
Now start to create one topic for each of the Main Menu options, like this:
Place the menu option image on the left side of the page, just below the topic title.
Then create a topic for each of this menu options. Using the highlight as a sign where the user is.
When you finished adding them all, go back to the first Menu image, select it (using RoboHelp) and right-click to insert Image Map, a rectangular hyperlink in each one. Do all the links on the first one and them copy them onto the other ones. Always link the top or title option (like Favorites) back to the Main Menu Bar, so that the user can navigate to other menu options.
Planning How to Develop Your Project Content
Creating Topics
My advice is to start a skeleton TOC structure and start from there. I would suggest the following basic structure:
- Welcome page, showing basic info on the application and company.
- Document Information, including review table and release dates as well the conventions and icons used in the document (Attention, Warning, Notes, etc.)
- Background Information, including required background info about the product, system overview diagrams and system requirements.
- Workflow section, including workflow diagrams linked to particular procedures in the OH.
- Getting Started, including the basic links to primary sections.
- Operation, including the Main Menu options and their descriptions.
- Maintenance section.
- Troubleshooting section.
Create a page showing the Menu option screenshot followed by the window it opens. On the window screenshot insert image maps for the Toolbar and/or Tabs. Then create subtopics for each button or tab describing its functionality.
Project Overall Planning & Development
- Identify our information sources,
- Create a topic outline for the application,
- Define a strategy to fill gap areas of information,
- Drill-down on topics to identify areas that need detailing,
- Identify content re-use for optimisation.
Phase 1 OH Defining OH Structure (NZWTA)
1st Phase : Creating a skeleton of topics for all content including existing content from the old online help, menu options and new topics.Example:
{Topic Title} {Breadcrumbs}
Doc. Ref. {CODE}
{IMG Menu Option}
{IMG Window/Form}
Form Usage
<ADD INFO>.
Operating Instructions
<ADD INFO>.
Buttons Available
{IMG Button} Use this button to <ADD INFO>.
Fields Available
{FIELD NAME}: <ADD INFO>.
Phase 2 OH Defining OH Basic Content (NZWTA)
- Adding the Doc Info / Background Info
- Adding Menu Structure
Phase 3 OH Developing OH Content (NZWTA)
- Background Info
- Workflow
- Getting Started (Login)
- Operation (Menus)
- Window/Form level
- Toolbar level
- Tab level
- Dialog box level
- Shared Windows/Forms
- Operating Procedures (related with the workflows)
- Glossary of Technical Terms Used in the Wool Industry
General Tasks:
Drilling down into each menu option outline adding topics for Toolbar, Button options and form Tabs.
Adding operating procedure descriptions for those topics which I can figured the application functionality by myself without consulting the SMEs.
Gathering more information about forms/windows purpose and functionality that is not apparent or hidden with passwords or user access and adding that information to topics.
Gathering information on forms/windows fields and control's usage and data sources and adding that information to topics. Creating a working Glossary of terms.
Checking content relationship between topics for re-usage.
Phase 4 OH Testing (NZWTA)
- Help Map #s List (+ Fixing Fault HelpContextID calls by replacing old map#s for new ones).
- Updating OH Topics to reflect April 2015 development changes on the Menu options.
- Adding/Calculating Project Task's Completion % (New Project Chart Column). (Management request)
- Global Check for Outstanding Features.
- Global Test with the OH Internal Links (Missing links and/Broken links).
- Global Test with the Map#s (if they are displaying the correct page).
- Project Wrap Up for NZWTA Report.
Phase 5 OH Maintenance (NZWTA)
Collecting feedback from users.Phase 6 OH Conversion/Development (AWTA)
Assessing which topics will be part of the Australian site and the new topics exclusively for the Australian site.Phase 7 OH Maintenance (AWTA)
Collecting feedback from users.Phase 8 Planning Development of Training Material
Training Material Definitions and Structure:- Defining the purpose and scope of the Tutorials (Require related staff meetings).
- Defining what tasks are basic to the work our users need to perform using MACS (Require related staff meetings).
- Defining breaking large scale tasks into their component medium-scale or small-scale tasks.
- Defining meaningful context-stories for each task so the user can relate the tutorial with their job.
- Defining Multi-media resources required to be implemented to clarify complex tasks (Require related staff meetings).
- Defining Tutorial tasks related to topics in the online help.
Phase 9 Developing Training Materials
- Develop training plans
- Develop training assessment plans
- Define target audiences
- Define training style manual for consistency
- Re-access system front-end analysis
- Structure content into modules
- Define the delivery medium
- Plan usability tests
- Implement usability test results into the training material plans
- Develop training sections (face-to-face or online) program
Updates
- 12/05/2014 - Post creation
- 07/05/2015 - Added project Phases into the Project Overall Planning & Development section.
- 11/05/2015 - Added new project as Phase 4 OH Testing, and renumbering the following ones accordingly.
No comments:
Post a Comment